
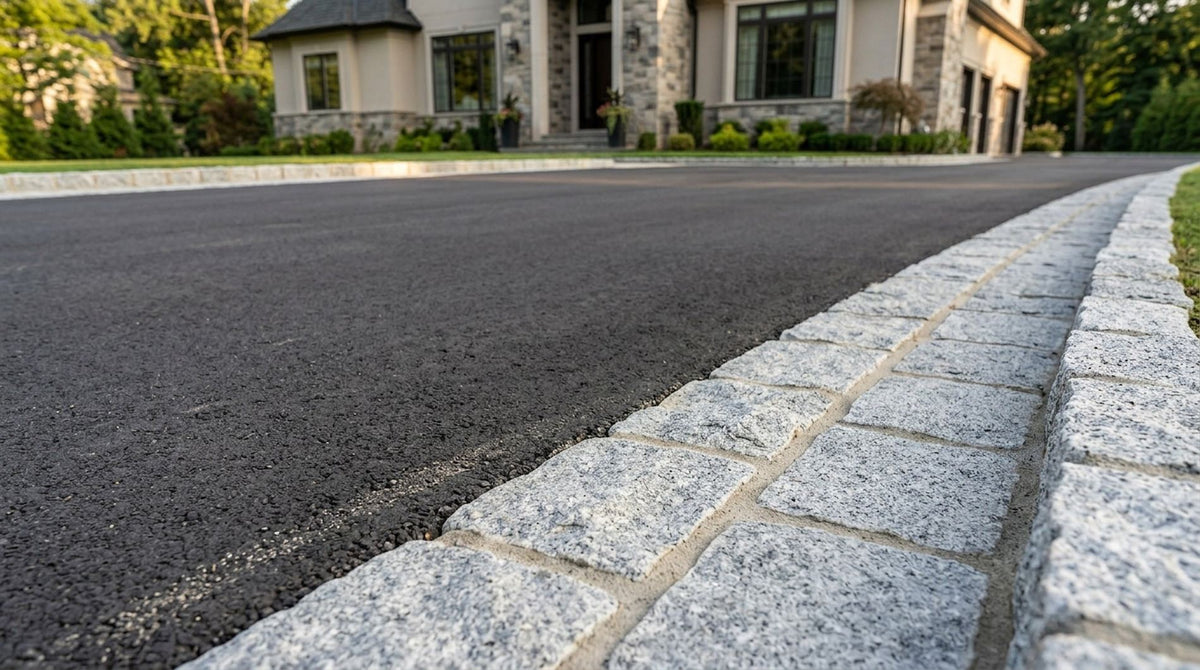
Granite Belgian blocks are one of those materials that look like they’ve always been there. Set in a clean line along a driveway, they instantly make the whole entrance feel more finished, more solid, and frankly, more expensive. The good news: with the right prep and a bit of patience, you can get that look without rebuilding the entire driveway.
This guide walks you through a practical, step‑by‑step approach to installing granite Belgian block driveway edging — from layout and excavation to base prep, setting the stones, and finishing the joints — so your new border doesn’t just look good on day one, but keeps its shape through freeze‑thaw cycles and daily traffic.
Maybe you are a homeowner planning a weekend project and want to know what you are signing up for. You might be a designer specifying a driveway border and want to check that the details are buildable. Or maybe you are a contractor who wants a clear sequence to share with your crew or your client. The steps below are the same for all of you.
Driveway edges take a beating: tires roll off the side, water runs along them, and soil tends to crumble into the pavement. Without a solid border, even a new driveway can start to look ragged in just a few seasons. Granite Belgian blocks solve all of that at once.
The blocks act as a solid curb that keeps asphalt or pavers in place, protects the edge from crumbling, and gives you a crisp line to landscape against. Because they’re solid, dense granite, they shrug off road salts, temperature swings, and occasional bumps from tires better than most common edging materials.
Our granite Belgian blocks are newly quarried in India and split to standard sizes. If you are after the worn, rounded look of old city streets, that is a different stone, reclaimed cobblestones; here is the difference between cobblestone and Belgian block.

Before you touch a shovel, you want a clear plan. Walk the full length of the driveway and decide where the edging starts, where it ends, and how it handles curves, flares, and transitions to walkways or street.
Work out how many Belgian blocks or reclaimed cobblestones you need for your edging with our Belgian Block & Cobblestone Edging Calculator.
A few minutes with a tape measure and string line here saves you from last‑minute runs for more stone or awkward gaps at the end of the run.
Installing granite Belgian block driveway edging is straightforward work, but it does demand the right tools and a firm base. Having everything on site before you start makes the process much smoother.
Choosing dense, quality granite blocks and a proper base material is what turns this from a quick visual upgrade into a long‑term hardscape investment.
Most failures with driveway edging come from shortcuts below the surface. A well‑cut trench and clean edge give you room to build a base that actually supports the stones.
Keep the trench consistent in depth as you go. Small variations get amplified once you start setting blocks, so it’s worth taking the time to check with a level and adjust as you dig.
Think of the base as the foundation of a wall. The blocks are just the visible part. If the base is soft or uneven, you’ll see it in wavy lines, tilted stones, and gaps opening over time.
Well‑compacted stone and a flat, pitched concrete bed are what let you set a straight, level course of granite blocks and keep it that way season after season.
With the base ready, it’s time for the most visible part of the project: setting the stone. This is where patience pays off. Small adjustments in the first few blocks set the tone for the entire run.
By the time you reach the end of the run, you want a smooth, continuous line that looks like it was set all at once, not a series of starts and stops.
Once all blocks are set and you’re happy with the alignment, it’s time to lock everything together. The joint treatment and backfill protect the base, help shed water, and give the edging its finished look.
A final rinse to remove dust from the granite faces and a careful sweep of the driveway surface is usually all it takes to make the new edging look like it has always belonged there.
One of the main reasons people choose granite Belgian blocks is that they age gracefully. A bit of patina just makes them look better. Still, a few simple habits will keep the border performing at its best.
With a solid base and minimal upkeep, your driveway edging becomes a long‑term upgrade rather than another line item on your maintenance list. For cleaning, joint care, and winter tips, see our granite Belgian block maintenance guide.
Most problems with driveway edging show up months or years after installation, when the weather and traffic have had time to test the work. Knowing the usual trouble spots up front helps you avoid them.
For most driveways, yes. A properly installed granite Belgian block edge turns your driveway into a defined, durable entrance that looks and feels intentional every time you pull in, and once it is set, the stone itself asks very little of you.
The trade‑off is the work. The digging, base prep, and lifting are real (a grey jumbo block weighs about 26 pounds), and the edge is only as good as the base under it. If you’d rather avoid those headaches entirely, this same sequence of steps is exactly what a good installer will follow — just with a crew, heavier equipment, and the benefit of repetition. Our DIY vs. pro installation guide can help you decide, and our driveway edging and apron styles can help you pick a look.
When you are ready, add the granite Belgian blocks to your cart and enter your address for a shipping quote. If it looks too high, call us at (718) 379-1232; we sometimes have alternative ways to get your Belgian blocks to your door for a more reasonable price.
The information provided in our guides, installation tips, and blog content is for general reference only. Every project is unique, and site conditions can vary. We strongly recommend consulting a qualified professional installer to review your specific project and provide final guidance.

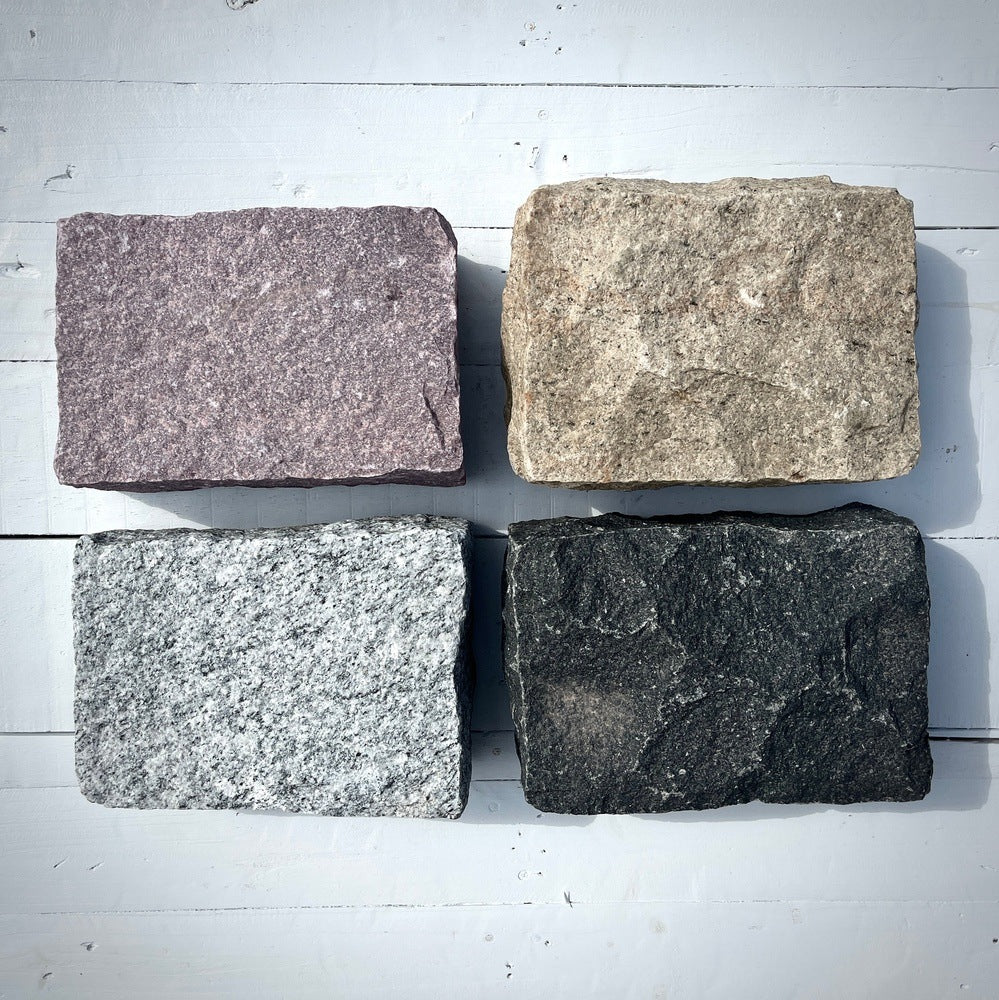



Elevate your outdoor spaces with Chief Bricks’ New Jumbo Cobblestones, the highest-quality cobblestones in the USA. Handcut from one of the hardest granites in the world, these durable, non-tumbled stones are designed for lasting performance and stunning visual appeal. Whether you’re installing a cobblestone driveway, walkway, or patio, our cobblestones are engineered to stand the test of time while offering seamless installation with 100% usability.
A cobblestone driveway not only boosts curb appeal but also makes a statement about the quality of your home. Impress visitors and enhance your property’s value with these durable, non-tumbled stones that exude timeless elegance and unparalleled durability.
Work out how many Belgian blocks or reclaimed cobblestones you need for your edging with our Belgian Block & Cobblestone Edging Calculator.
Pictures are an indication only. Feel, look and color differ from item to item.


Share: