
Removing Weeds Between Cobblestones: Best Practices is the kind of topic you usually Google after staring at a driveway, courtyard, or garden path that has quietly turned into a patchy lawn. You might have reclaimed bricks, antique cobbles, or Belgian blocks that deserve better than a messy fringe of grass and moss between every joint. So this guide on Removing Weeds Between Cobblestones: Best Practices is here to walk you through methods that actually work, protect your paving investment, and still respect the soil and planting nearby.
Table of Contents:
- Why Weeds Love Cobblestones So Much
- Health, Safety, and Gear Before You Start
- Removing Weeds Between Cobblestones: Best Practices And Core Methods
- Deep Cleaning The Joints After Weed Removal
- Refilling Joints: Polymeric Sand And Why It Matters
- Thinking About Best Practices Like A Pro
- Step By Step Cobblestone Weed Control Routine
- Design Choices That Reduce Future Weeds
- Working Around Historic Or Reclaimed Stone
- Conclusion
Why Weeds Love Cobblestones So Much
If weeds keep coming back, you are not doing anything wrong. Cobblestones and old brick setts just create perfect growing conditions for unwanted weeds. Small joints, dust, organic debris, and a little moisture are all many plants need.
The gaps between stones trap fine garden soil and broken-down leaf matter. Wind blows in weed seeds, birds drop more, and rain carries extra grit into those cracks. That turns your paving joints into narrow but fertile seedbeds.
Architects and builders know this already. Traditional stone paving moves slightly with frost and foot traffic, so joints are never totally sealed. That small movement creates hairline openings, which is all annual weeds need to establish a foothold.
These hard surfaces absorb heat during the day and stay warm at night, helping weeds grow faster than they might in a shaded border. Even tiny cracks allow weeds growing at ground level to send down taproots. Once established, these plants thrive on the neglected moisture found beneath the stones.
Health, Safety, and Gear Before You Start
Pulling weeds from tight joints sounds simple, but it is hard on hands, back, and knees. A little planning makes the work faster and less painful. That matters whether you maintain one front path or a multi courtyard project.
Gloves, knee pads, and comfort
Hand weeding in crevices can shred fingers if you do not wear gloves. It helps to wear tight fitting gloves with good grip so you can hold stones and tools without slipping. Gloves like these slim fit garden gloves give you dexterity yet protect skin from sharp grit and roots.
You also need protection from irritants like poison ivy that might be hiding among the benign grass. If you have a large surface, kneeling on patio stones for an hour gets rough fast. Use knee pads or a folded mat and shift position often.
Small comfort steps are the difference between a finished project and one you abandon halfway because you cannot stand the discomfort. It is hard work, but the right gear makes the job easier. Taking care of your body lets you focus on the task at hand.
Timing your weed attack
Moist soil makes a big difference in how easily you can remove weeds. Weeds pull more cleanly a day after rain or after a gentle soaking. This damp soil pull technique prevents the roots from snapping off.
Dry joints tend to snap roots and leave the base in place, which means fast regrowth. Choose a cool part of the day, especially if you will work with heat based methods. Direct overhead sun makes stone surfaces very hot and tiring to work on.
It also makes it harder to spot smaller seedlings because of glare and shadow. Planning around the weather is a trick gardening pros use to save effort. Working with damp soil turns a struggle into a satisfying cleanup.
Removing Weeds Between Cobblestones: Best Practices And Core Methods
The most effective strategy is usually a mix. You combine mechanical removal, heat or steam where useful, careful chemical choices if needed, and then strong prevention. This way you stop attacking the same weed problems every few weeks.
1. Hand weeding and crevice tools
Let us start with the simplest approach, because it is still the foundation for many projects. Hand weeding is slow but precise, and it gives you full control around historic brick and delicate stone. It is the best way to handle manual weed removal in small areas.
Use a narrow tool made for tight joints rather than a big hoe. A crevice scraper such as the Weed Cracker Dutch hand hoe can reach between setts, hook under roots, and drag out moss and soil. That kind of thin L shaped blade keeps pressure on the weed, not on the edge of the cobble.
Work methodically. Start on one edge of the paving area and clear joint by joint in rows. Shake loosened soil away from plant material so you can collect debris in a bucket and keep it out of the gaps.
Make sure you grab the weed root firmly. If you only tear off the leaves, the weed roots will regenerate quickly. Tools designed for this specific purpose help you lever the entire plant out of the gap.
2. Steam machines and hot water
If the surface is large or hand weeding feels impossible, hot water and steam help soften or kill weeds in the joints. Heat denatures cell walls and collapses the structure of soft stems and young roots. You can use this alone or just to loosen growth before you scrape it out.
A consumer steam machine like the McCulloch heavy duty cleaner can direct high temperature steam along the joints. Steam reaches deeper than boiling water because it can penetrate gaps without flowing away. This matters with cobbles set in irregular bedding, where roots find deep cool pockets.
Move slowly and give the steam a moment to work on each line of weeds. For older growth you might need a couple of passes, then follow up with a hand tool to remove the softened plants and roots. On large sites, some contractors combine this method with vacuums to suck out debris in the same pass.
For a good old-fashioned DIY approach, you can try the boiling water method. Simply boil a kettle and carefully pour the water directly onto the offending plants. You must pour boiling water close to the ground level to avoid splashing.
This water method is effective for spot treatments on patio stones where you want to avoid chemicals. It cooks the plant instantly. Just be careful not to pour boiling liquid on your own feet or desirable plants nearby.
3. Flame weeding on stone joints
For certain sites, especially long drives or service yards, flame weeding can be very efficient. The basic idea is that you sweep a gas flame quickly over weeds and use intense heat to burst plant cells. You are not trying to turn the plants to ash, only to damage them beyond recovery.
The University of Vermont Extension explains in its Flame Weeding factsheet that brief contact with a hot flame is enough to make plant tissues collapse within hours. Roots on larger perennial weeds might still resprout, but top growth is set back and repeated treatments wear plants out over time. This is helpful in repeated maintenance on stone paving where new seedlings keep arriving.
Use weed burners with care near dry mulch, wood structures, or planting beds. Always check local rules about open flame use before planning a routine around it. You use the heat to kill plants, not to start a bonfire.
For heritage sites with old cobbles, test in a small hidden area first to watch for soot marking or damage to soft lime joints. This method is great to heat weeds quickly over large areas. However, it requires caution to ensure safety.
4. Herbicides, including glyphosate, as a last resort
Some projects demand very low labor input once in use, and managers reach for herbicides. This might be a big commercial apron or tight service yard with little access. If you are considering this path, you need a realistic view of tradeoffs.
Glyphosate based weedkillers have been used for decades in landscape and farm settings. According to background on glyphosate described in public references such as the glyphosate page on Wikipedia, it works by blocking a specific plant enzyme and is taken up through leaves into roots. This makes it effective on established weeds, but you must avoid spray drift and runoff into borders and lawns.
Be aware of regulations and debates about safety, labeling, and where this kind of product can be used. For most homes, gardens, and crafted cobble spaces, many designers now favor manual, steam, or flame based methods first. Chemicals, if used at all, often come in as a targeted tool rather than the main strategy.
Many homeowners prefer to avoid chemical herbicides due to health concerns. If you do use them, follow the label instructions strictly. Harsh chemicals can damage surrounding ecosystems if mishandled.
5. Natural DIY Solutions
If you want to avoid commercial weed killers but manual removal is too difficult, you can mix household items. A popular recipe involves household white vinegar and dish soap. The acetic acid in vinegar acts as a contact herbicide.
Mix one gallon of white vinegar with a tablespoon of dish soap. The soap helps the liquid stick to the leaves so the acid can do its work. This mixture burns the foliage it touches, so be careful near your garden borders.
Household white vinegar usually has an acidity of 5 percent, which kills young weeds. For tougher plants, you might need horticultural vinegar with higher acetic acid content. However, remember this primarily kills top growth and may not kill plant roots completely.
Another option for prevention is baking soda. Sprinkling baking soda into the cracks increases soil salinity, making it hard for plants to survive. This helps prevent weed seeds from germinating in the narrow gaps.
Deep Cleaning The Joints After Weed Removal
Getting weeds out is only stage one. The joints still hold seeds, tiny roots, and organic dust. If you leave that material, you are giving next season a head start.
Once you have removed most green material by hand, heat, or both, brush the surface hard with a stiff broom. Push loose grit and plant fragments out of joints instead of down into them. If your site grade allows it, sweep everything toward a collection point or a drain with a trap you can clear.
Some teams like to use a low pressure rinse at this stage. Keep the spray angled so it flushes material along the joints without gouging out bedding sand or mortar. This helps you achieve a clean patio surface ready for refilling.
Avoid strong pressure on old cobblestones because it can damage aged joints or patina. The goal is to clear the underlying soil of debris without destroying the foundation. A clean joint is essential for the next step of filling gaps.
Refilling Joints: Polymeric Sand And Why It Matters
The main reason weeds come back fast is simple. The gaps remain open and full of fine material where seeds germinate again. You need a joint filler that packs tightly, drains, and is hard for roots to penetrate.
Many professionals now like polymer enhanced sands for joints between pavers and smaller cobbles. After cleaning, you sweep a product such as polymeric jointing sand over the surface and into every gap. This kind of sand has binders that activate with water and lock grains together.
A similar concept is sold as polymeric sand for broader paver use by hardscape suppliers. The idea is that, once set, the joints become firm and resist both erosion and seed germination while still letting water drain. This approach works especially well on patios, paths, and walkways laid on a flexible base rather than rigid concrete.
Key steps for success with polymeric joint sand look like this.
- Dry surface and joints before application.
- Spread and sweep sand so every joint is fully filled.
- Tap or vibrate the surface lightly if the product instructions suggest it, to settle sand.
- Remove every grain from stone surfaces before misting, so there is no haze.
- Mist gently to activate binders without washing sand out of joints.
If you miss that cleaning step before watering, you often see a faint film on darker stones. It usually weathers, but careful cleanup is still worth the extra ten minutes of work. Done right, this joint treatment can cut new weed growth sharply and lengthen time between maintenance cycles.
By filling the gaps properly, you physically prevent weed seeds from finding a place to land. It acts as a barrier to the soil below. This is one of the most effective ways to prevent weed issues long-term.
Comparing Main Weed Control Methods For Cobblestones
Architects, home builders, and landscapers like to compare methods by cost, labor, and risk. The table below gives a simple snapshot to help you think through long term maintenance on cobble or reclaimed brick projects.
| Method | Upfront cost | Labor | Weed regrowth speed | Stone and soil impact |
|---|---|---|---|---|
| Hand weeding with crevice tools | Low | High on large areas | Slow if roots removed | Very gentle when done with care |
| Steam machine / Boiling water | Medium (machine) / Low (kettle) | Moderate | Medium, often needs repeat passes | No chemical residue, gentle on soil life |
| Flame weeding | Medium | Low to moderate | Fast top kill, regrowth possible | Heat risk near dry materials, no residue |
| Herbicide / Vinegar | Low | Low | Slow initial, deeper root kill on some species | Chemical concerns or soil acidity changes |
| Polymeric sand in joints | Medium | Moderate during install | Prevents many seedlings | Strengthens joints, supports surface stability |
You will notice that there is no single magic choice that wins on every row. That is why experienced hardscape teams mix tools and schedule, and set expectations with clients up front. The right combination depends on scale, heritage value, local rules, and budget.
Thinking About Best Practices Like A Pro
You probably spotted this already. Removing weeds is only part of your project. You are also trying to apply solid best practices so you are not redoing the same labor every month.
Other fields have strict protocols, and gardening should be no different. You need to approach your paving stones with a maintenance schedule in mind. It is not just about a one-time clean patio effort.
Think about how nature interacts with your hardscape. If you monitor where weeds growing clusters appear, you can identify drainage issues or open joints. This observation is key to long-term success.
Urban planners and policy makers also study best practices as they refine guidelines and learn from global projects. You can take that same mindset into your cobblestone maintenance plan. Treat each clean and refill cycle as data, adjust timing and methods, and capture what works for your climate and stone.
Step By Step Cobblestone Weed Control Routine
To help you turn all this into a repeatable pattern, here is a simple staged approach. This works well on reclaimed bricks, cobblestones, and Belgian blocks in both homes and public spaces.

Stage 1: Inspection and mapping
Walk the area slowly and note where weeds cluster. Are they mostly on edges near soil beds, or through the whole field. Notice any loose stones or subsided patches that need repair before you invest in joint treatment.
Stage 2: Primary removal
Use a crevice weeder for tight spaces and spots close to plant beds you want to protect. Pull or pry weeds out by the root whenever possible, rather than snapping tops off. This manual removal ensures you get the whole plant.
For large zones, consider using a steam machine or flame unit as a first pass. This will soften growth before you perform the manual cleanup. It makes the physical pulling much easier.
Stage 3: Deep joint cleaning
Sweep vigorously across the pattern rather than along it so you drag more debris out of joints. Use a narrow scraper to clear any joints that still look packed with soil. This prepares the ground for fresh sand.
If your design and mortar allow it, follow with a gentle rinse. This helps push loose fines away from the surface. Ensure the joints are deep enough to accept new material.
Stage 4: Joint refill and stabilization
Wait until the paving surface and joints are fully dry. Spread polymeric joint sand evenly, sweeping it at a diagonal across the layout so joints fill completely. Clear any sand off the faces of cobbles and bricks before you start to mist.
Then apply light water following the manufacturer pattern, usually several passes of gentle spray instead of a single soak. Avoid walking on the joints while they set. Many products like a dry weather window to harden properly, so plan this step around your forecast.
Stage 5: Ongoing quick maintenance
Once or twice a season, do a quick inspection pass. Pluck out any seedlings before they establish strong roots, which takes very little time compared with a full weed campaign. Dealing with young weeds is always easier than fighting established ones.
Touch up polymeric joints only where they have been washed out by heavy rain, plows, or tire action. A little baking soda in the cracks can help prevent weed seeds from sprouting here. Keeping the joints full is your best defense.
Design Choices That Reduce Future Weeds
If you are still at the planning or build stage, your design choices have a huge impact on future weed pressure. Architects and builders can help owners by treating weed control as part of the initial spec, not an afterthought. That can save countless hours later.
Here are a few ideas.
- Use quality bedding material under cobbles, such as compacted sharp sand or stone dust that drains and resists mixing with top fines.
- Avoid wide, deep joints that act as flowerbeds unless they are intentionally planted.
- Design edge details so soil and mulch from adjacent beds does not wash across and into joints in heavy rain.
- Plan drainage so standing water does not sit in low pockets and weaken joint material.
These details may not sound glamorous. But they have a strong effect on how often someone is down on their knees pulling plants between stones. Good hardscape detailing pays back for years in cleaner lines and easier care.
Working Around Historic Or Reclaimed Stone
If your project uses reclaimed bricks, vintage cobbles, or old Belgian blocks, you probably care a lot about preserving their look. You may also have restrictions about cleaning methods or materials, especially in conservation areas. So you need a lighter touch and a careful plan.
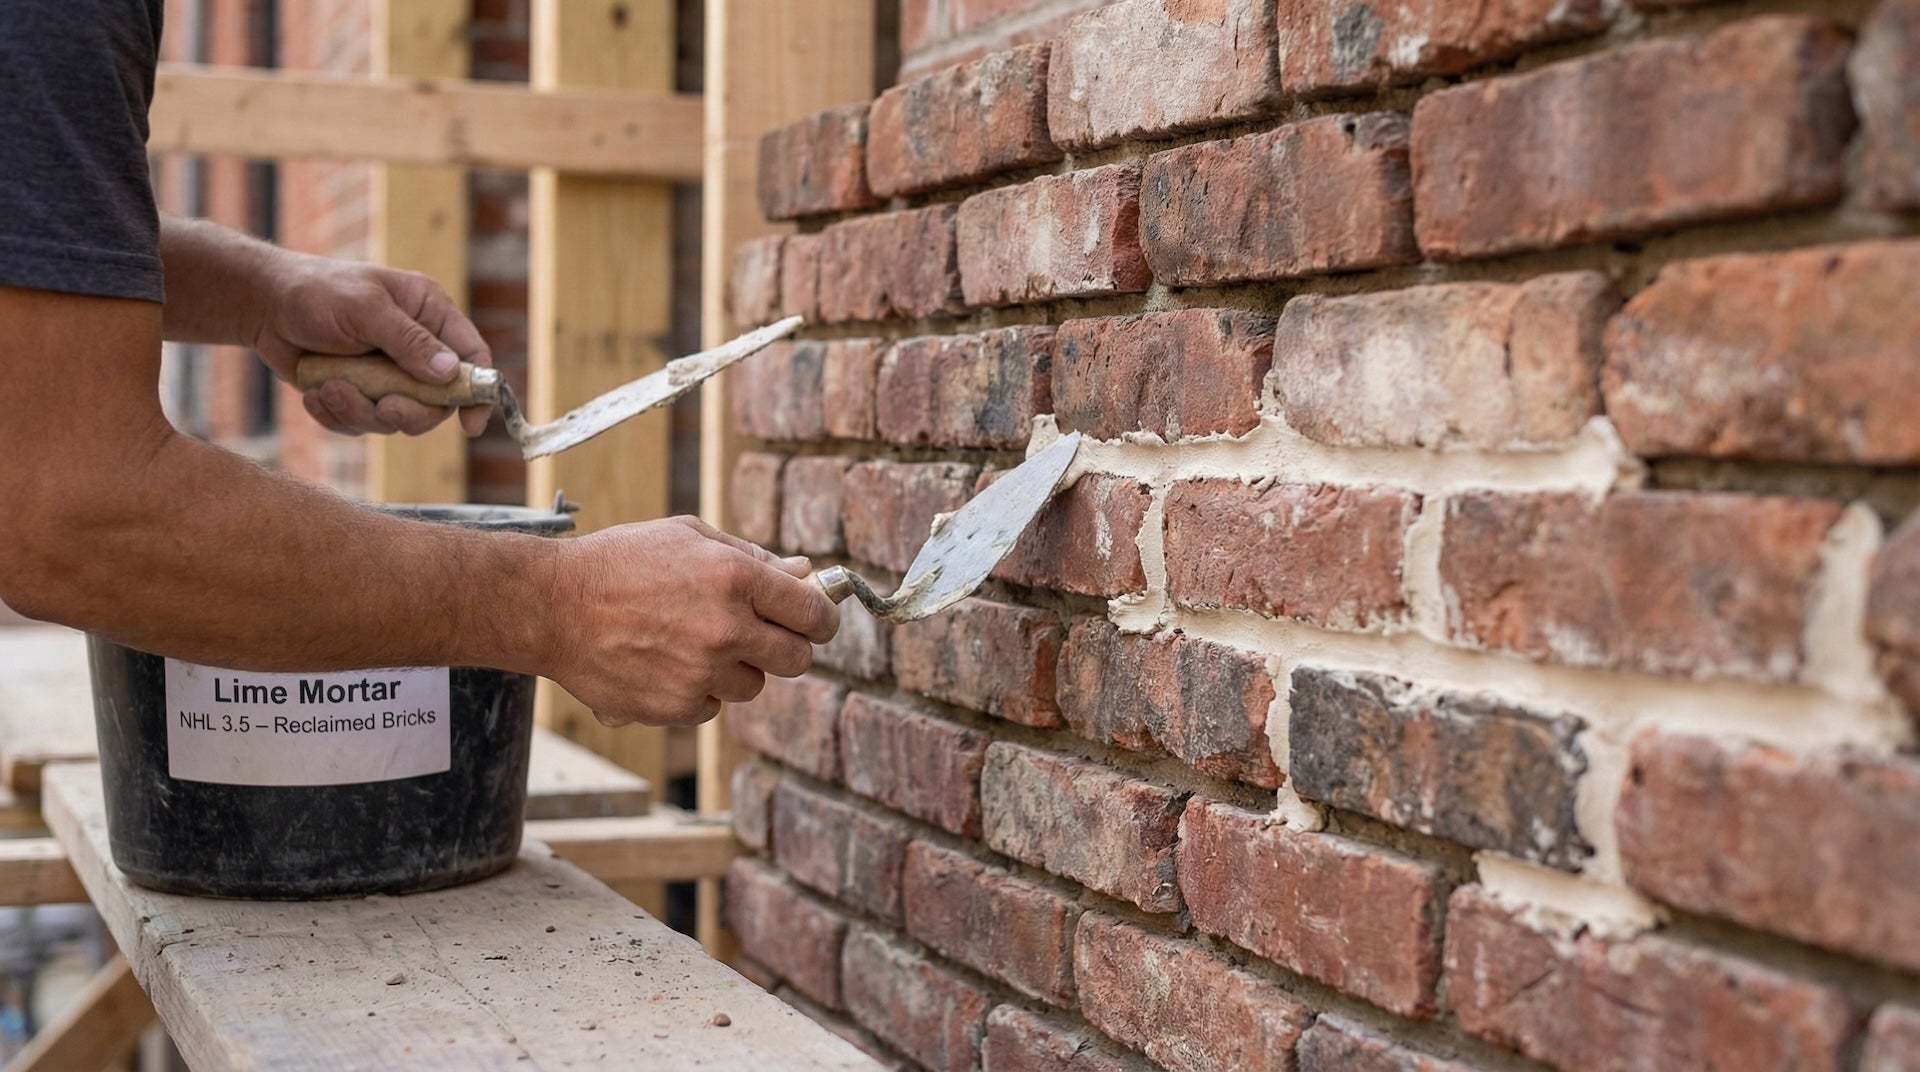
On older surfaces with lime based joints, be wary of pressure washers and aggressive chemicals. Gentler manual weeding, followed by dry brushing and a sensitive joint treatment, usually keeps character intact. In some heritage settings, you might even skip polymeric sand and use compatible mineral grouts, but you will then rely more on regular hand weeding.
Steam and low flame treatments are often more acceptable than heavy spray chemicals on sensitive stone, but always test in a corner first. Look for color change, spalling, or staining before you commit to the entire courtyard. If in doubt, involve a conservation specialist, especially on landmark or historic projects.
Conclusion
Removing Weeds Between Cobblestones: Best Practices comes down to a few clear ideas. Clear weeds thoroughly with the right tools, clean joints well, lock them with smart fillers like polymeric sand, and repeat light maintenance instead of crisis cleanups. It requires a bit of good old-fashioned effort initially, but the results are worth it.
From a small garden path to a grand courtyard of reclaimed cobbles, this rhythm keeps stone looking sharp. It extends the life of your paving without turning weed control into a full time job. With the right approach, you can stop fighting nature and start enjoying your space again.


Share: