
Slopes can be hard to love when all they give you is erosion, awkward mowing, and slippery shortcuts. Granite steps and landings change that. With the right layout, they turn a steep or uneven yard into a series of comfortable garden rooms connected by solid, natural-looking paths.
Granite garden stairs feel like they belong outdoors. They have enough weight to sit confidently on a hillside, and enough character to blend in with plantings, boulders, and retaining walls. Instead of one long, intimidating climb, you get a set of safe, attractive steps you actually want to use.
In this article, you will see how granite steps, treads, and landings work on slopes, how to plan hillside paths that feel natural, and what to consider for drainage, safety, and longevity in different U.S. climates.
Table of Contents
- Why Granite Works So Well on Slopes
- Design Approaches for Garden Stairs and Hillside Paths
- Planning the Layout in Sloped Yards
- Step Types and Treads for Garden Use
- Installation Basics for Hillside Granite Stairs
- Drainage and Erosion Control Around Steps
- Safety and Comfort in Outdoor Stair Design
- Working with Landscape Pros and Stone Suppliers
Why Granite Works So Well on Slopes
Hillside paths ask a lot from any material. They have to handle repeated foot traffic, weather, and slight ground movement over time. Granite has the density and durability to live comfortably in this environment, which is why you see it in parks, public gardens, and long-running trails.
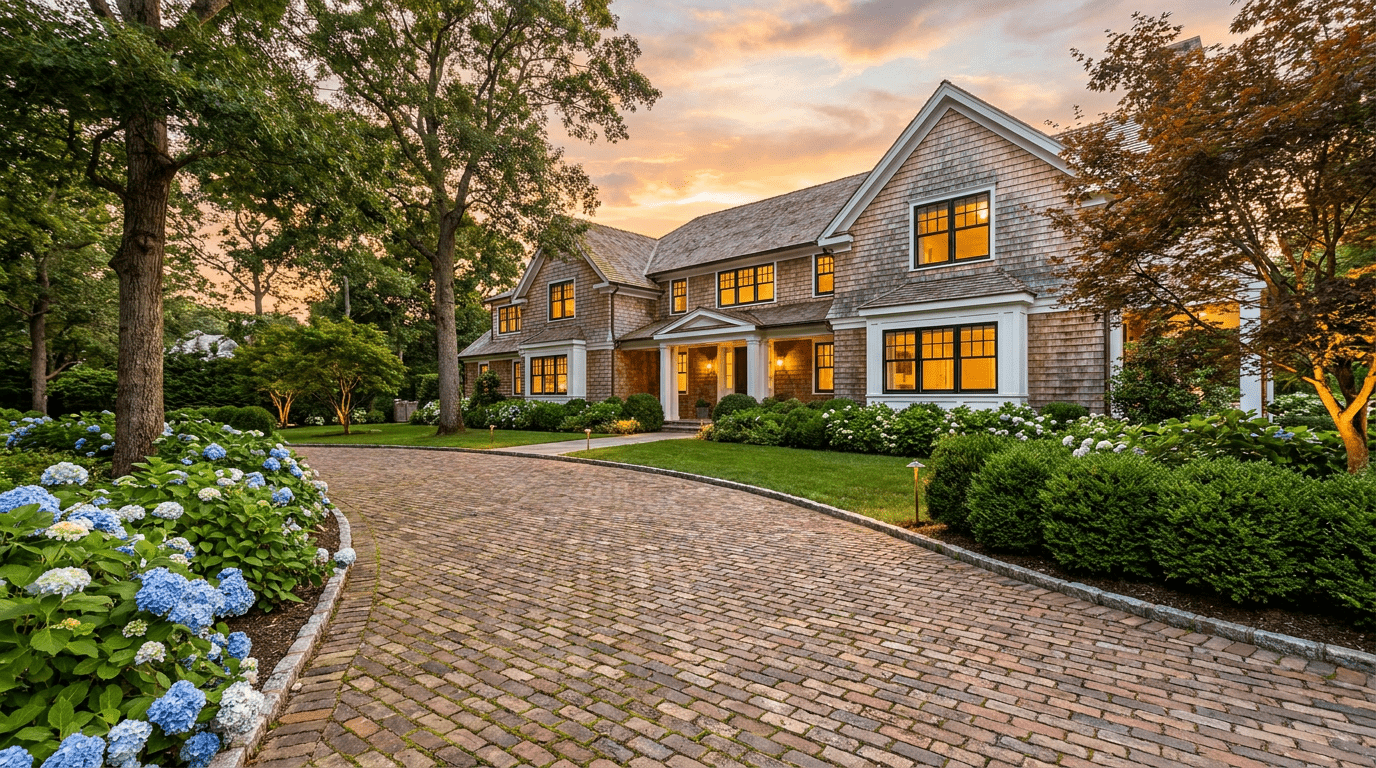
Natural stone also looks at home outdoors. Subtle color variation, grain, and texture let granite blend into plantings and boulders in a way poured concrete rarely does. Even when the rest of the yard changes, well-placed granite steps tend to look like they were always meant to be there.
For homeowners across the U.S., granite garden stairs offer an upgrade that solves practical problems—access, erosion, and safety—while also making sloped spaces more inviting to use every day.
Design Approaches for Garden Stairs and Hillside Paths
Before you start ordering stone, it helps to think about what kind of path your slope wants to be. Different layouts fit different yards, from tight side yards to wide, terraced hillsides.
Informal stone steps that follow the land
On gentle to moderate slopes, many designers like to use staggered granite steps that follow the natural grade. Treads might be set into lawn, gravel, or planting beds. The result is a path that feels casual and organic rather than rigid.
This approach works especially well in cottage-style gardens, woodland edges, and naturalized landscapes where you want the stairs to disappear into the planting rather than stand out as a big structure.
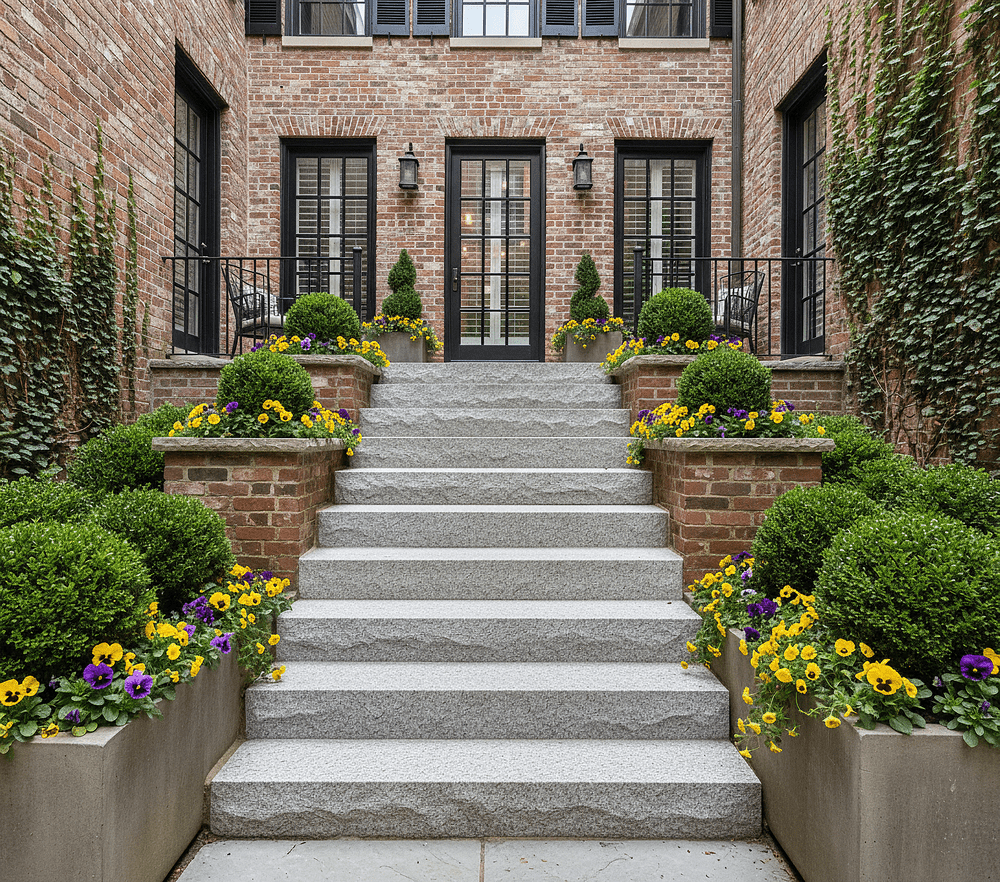
Formal stair flights between terraces
On steeper slopes, you may need retaining walls or terraces. In those cases, a more formal set of granite stairs connecting flattened levels can be the safest and most comfortable solution. Straight runs or gentle L-shapes work well when you are moving between distinct spaces.
Formal stair flights pair nicely with structured planting, hedges, and patios. Granite treads give these connections a sense of permanence and keep the hardscape consistent from one level to the next.
Meandering hillside paths with landings
Not every hillside path needs to go straight up and down. In fact, meandering routes often feel more comfortable and less steep. By zig-zagging across the slope and adding small landings, you can create a leisurely climb that feels like a walk rather than a workout.
Short runs of granite steps, broken by flat resting spots or viewing areas, make it easier to move through a garden at your own pace and enjoy the plantings along the way.
Planning the Layout in Sloped Yards
Good hillside stairs start on paper. A little planning goes a long way when you are working with elevation changes, drainage, and planting space.
Measure the total rise and rough route
Begin by measuring the total vertical rise from the bottom of the slope to the upper destination. Then sketch the rough route you think makes sense—straight run, switchbacks, or a gentle curve that follows the land.
Once you know the total rise, you can divide it into comfortable riser heights and step counts. This helps you decide how many steps and landings you will need and where they should go.
Break the hill into manageable sections
Instead of one long flight, most hillside paths feel better when broken into sections. Landings give you a moment to rest, turn, and take in the view. They also provide convenient spots for benches, planters, or small features like a birdbath.
On larger slopes, these landings can double as mini-terraces for seating areas or planting pockets, connected by short runs of granite steps.
Step Types and Treads for Garden Use
Granite stairs for the garden can be built from different kinds of stone elements, each with its own look and installation style.
Solid granite step blocks
Solid step blocks are large, one-piece units that combine riser and tread in a single stone. They are heavy, stable, and well suited to slopes where you want each step to sit firmly on compacted base material.
Because they are so substantial, step blocks often feel like part of the landscape itself. They are a great choice for rustic paths, woodland gardens, and spots where you want a bold, durable solution.
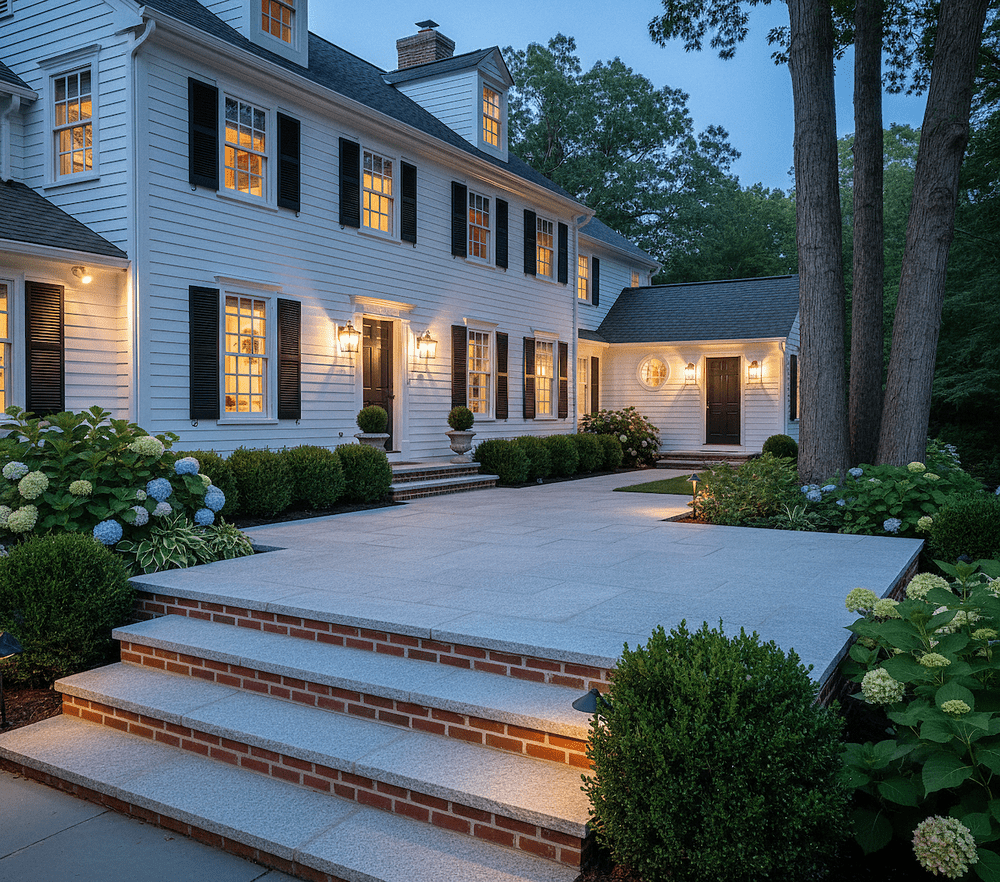
Granite treads on built risers
In other projects, you might build risers from concrete, block, or natural stone, then cap them with granite treads. This gives you more flexibility in step height and depth while still delivering a clean, durable walking surface.
Treads can be combined with stone cheek walls and planters to make the stairs feel integrated with nearby patios, retaining walls, or pool decks.
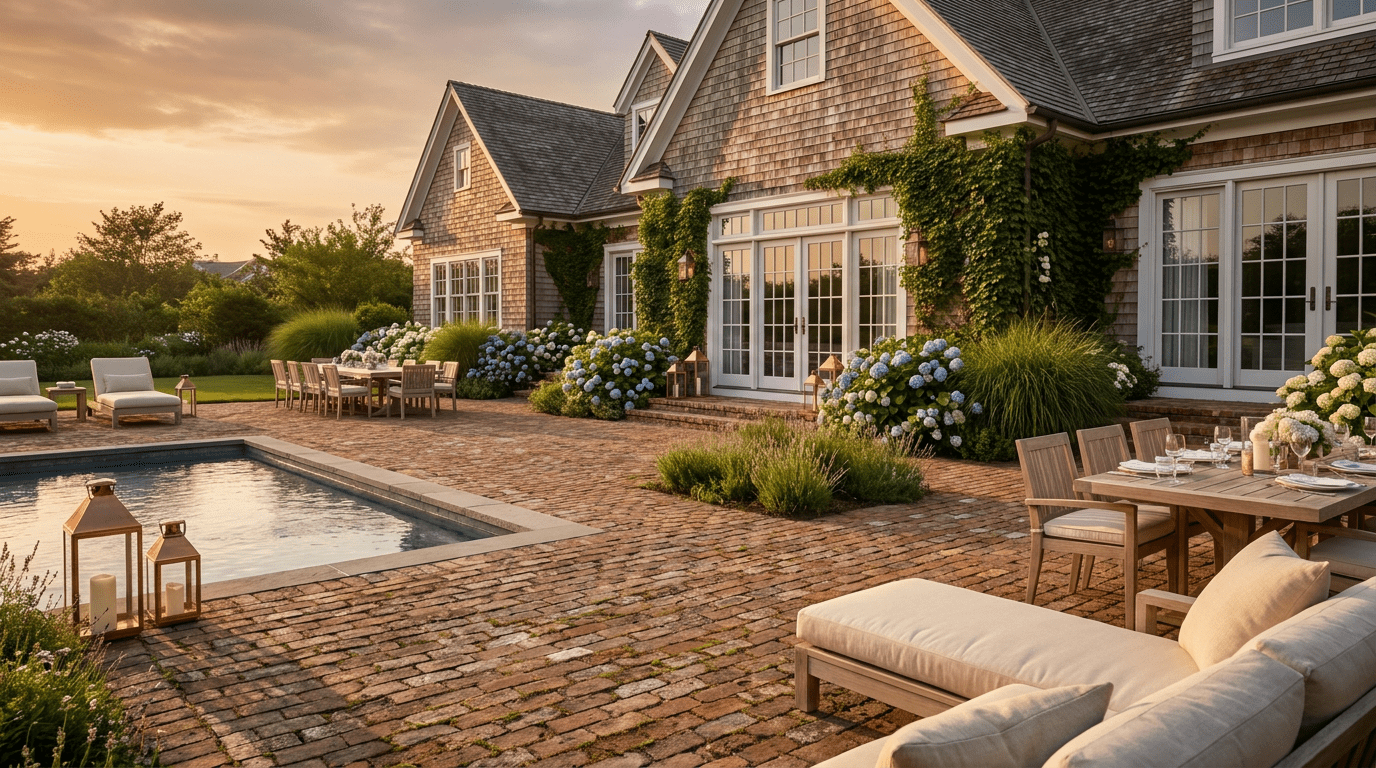
Landing materials that complement granite
Landings between runs of stairs can be finished in granite slabs, pattern pavers, gravel, or a combination of materials. The key is choosing something that handles water well and feels comfortable underfoot.
Using granite at key touchpoints—step edges, thresholds, and main landings—while mixing in other materials elsewhere can help manage budget without losing a cohesive look.
Installation Basics for Hillside Granite Stairs
Hillsides add a layer of complexity to any installation. Gravity and water are always at work, so the foundation and backfill matter as much as the visible stone.
Excavate and build from undisturbed soil
Start by excavating to reach stable, undisturbed soil. Loose fill and topsoil do not provide reliable support for heavy stone. In many cases, you will step the excavation to create level pads for each step or landing.
Compacted base material—often crushed stone—goes under and behind each step. This helps distribute loads and allows water to drain away instead of pooling behind the stone.
Anchor steps carefully into the slope
Each step should be well seated so it cannot slide forward or tilt. For solid blocks, this often means keying the stone slightly into the slope and backfilling carefully. For built stairs, it means tying risers and cheek walls together structurally and providing proper footings where required.
Checking level, pitch, and alignment as you go ensures the finished path feels smooth and natural when you walk it.
Drainage and Erosion Control Around Steps
Water is one of the biggest long-term threats to hillside work. Good drainage and erosion control keep granite stairs looking and performing as they should.
Give water a clear path
Granite treads and landings should have a slight pitch so water runs off rather than collecting. Where possible, direct runoff to planting beds, gravel bands, or drains that can handle the flow.
On steeper sites, French drains, swales, and carefully placed catch basins may be part of the plan to keep water away from the back of steps and walls.
Stabilize surrounding soils
Plant roots, groundcovers, and mulch all help lock soil in place around your stairs. In exposed areas, erosion control fabrics and rock mulch can provide extra stability until plants are established.
By combining granite steps with thoughtful planting and grading, you reduce washouts and keep paths clear of mud and debris.
Safety and Comfort in Outdoor Stair Design
Garden stairs should feel inviting, not intimidating. A few practical choices make granite steps safer and more comfortable to use in all kinds of weather.
Choose grippy finishes and consistent risers
Thermal, flamed, or bush-hammered finishes add traction to granite treads without making them uncomfortable underfoot. These textures are especially helpful in rainy, snowy, or humid climates.
Keeping riser heights consistent from top to bottom helps people move confidently. Sudden changes in step height are a common cause of trips and stumbles.
Add railings and lighting where needed
Long or steep outdoor stairs often benefit from railings, especially if children, older adults, or guests will use the path regularly. Railings can be metal, wood, or integrated into low stone walls.
Low-voltage path lights, step lights, or downlights from nearby structures make it easier to see edges and landings at night, extending the time you can comfortably use your garden.
Working with Landscape Pros and Stone Suppliers
Granite garden stairs are a long-term investment, so it pays to work with professionals who understand slopes, drainage, and stone. A good landscape contractor and Chief Bricks can help you avoid common mistakes and get the most from your site.
Check our available step blocks, tread sizes, and finishes that suit outdoor use. Bring photos and rough measurements so we can recommend options that fit your grade and design style.
When the layout, stone selection, and installation all line up, your hillside path stops being a problem area and becomes one of your favorite parts of the property. Granite steps and landings give you a permanent, comfortable way to move through the landscape, season after season.


Share: